Progress is slow, but it's progress. Times like this a phrase from my Gramsy runs through my head. "little by little my girl, little by little".
 |
| Had to get rid of the rust on the hitch |
 |
Photo from Vintage
Trailer Supply |
We spent as much time as we could on Saturday prepping a couple of things for paint, and replacing the butyl tape beneath the drip edge on one side. The package from Vintage Trailer Supply came just in time. This all sounds so straightforward, I know but....
 |
| We repainted the oven hood |
The prepping and painting was. But the drip edge-- a lot more work than we expected.
 |
He ended up spending all day on that ladder
scraping away |
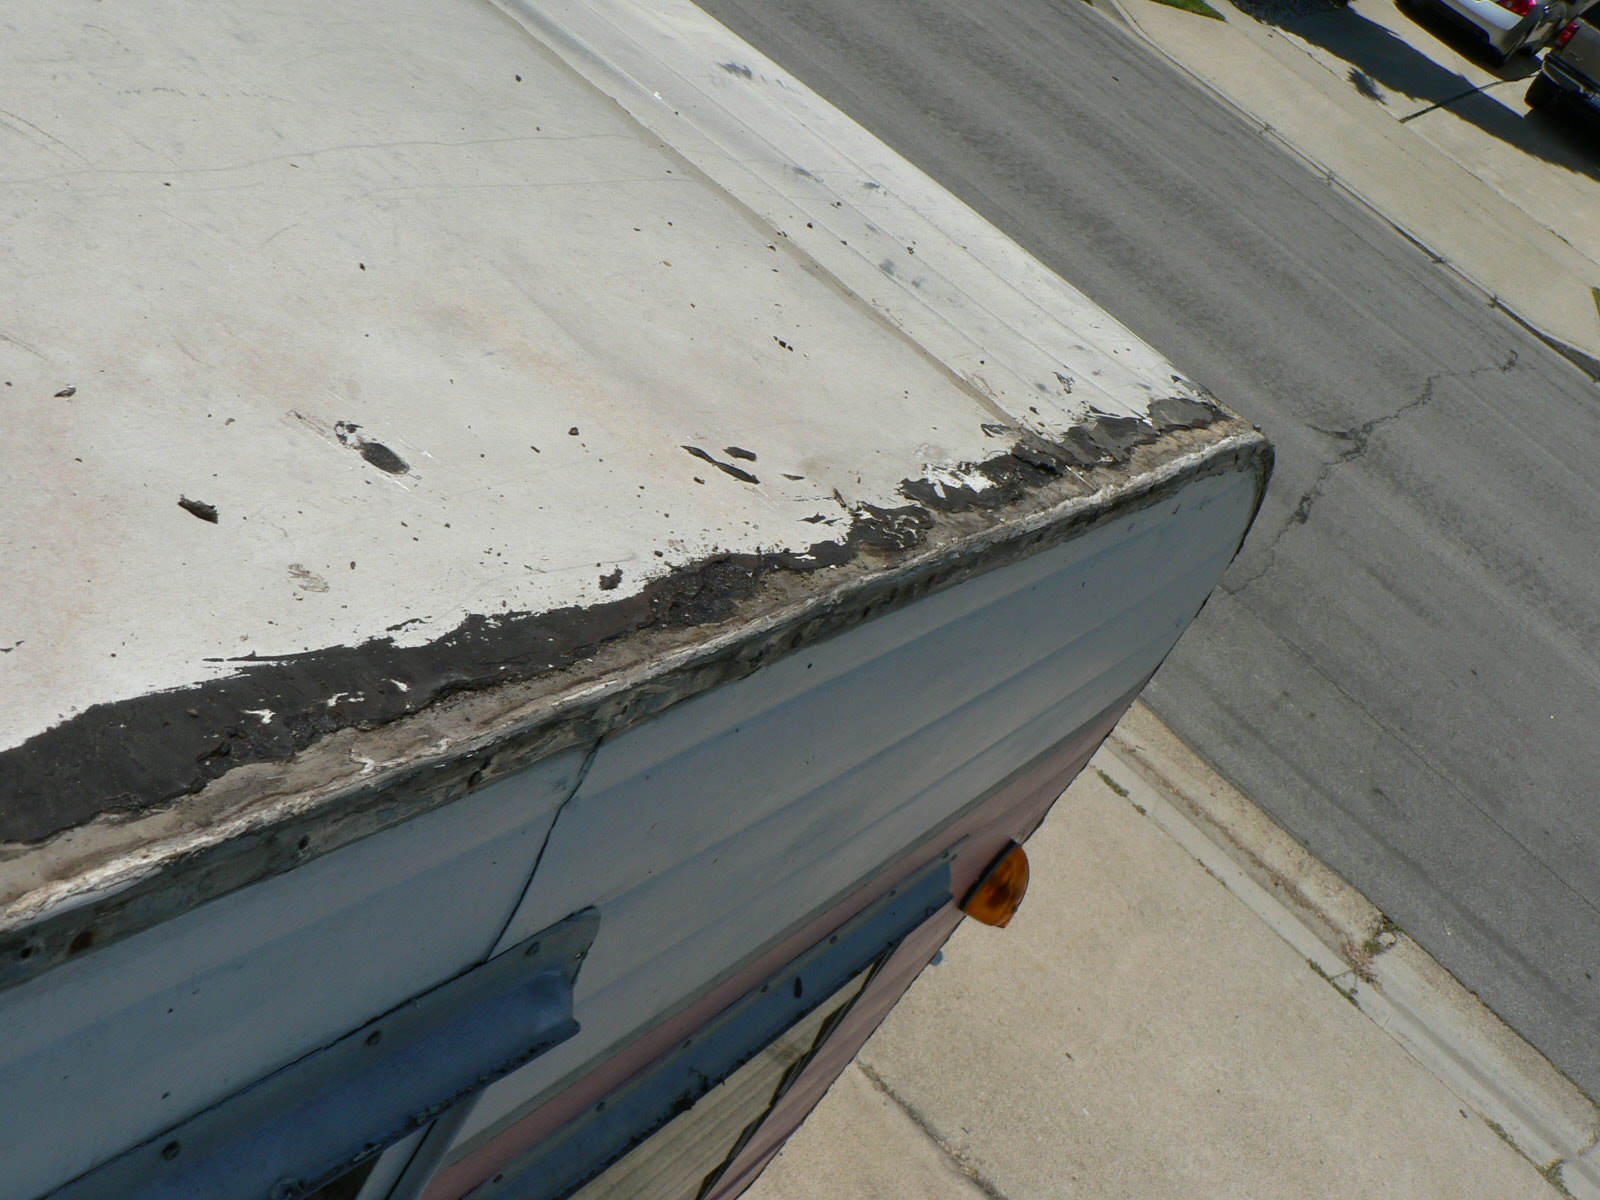
On the restoring Vintage trailer forums you read about this insidious black goo that is a pain to get off. Yeah, now we know what they are talking about.
I'm going to ask Erik to elaborate on these next pics.
Hi. Erik here. Usually I'm just a male model/laborer around here, but today I get the "privilege" of writing a bit. I knew there was a bunch of black and white goo along the curbside edge, but had no idea why. Once we got all the J rail and awning rail pulled off and I started scraping the reason for the "repairs" became evident.
Slowly I started seeing the pattern. Some previous owner had put screws or nails directly into the top of the roof, right along the edge. There was a hole about every 6-10 inches. Ugh.
In this shot you can see one of the screws still in place. It was totally covered over with black goo and caulk. Thankfully the caulk (in this location) wasn't silicone, so I could get a lot of it scraped off.
Here's a good shot of one the holes and the layers of junk up there. I finally got everything scraped as good as I was going to. I then drilled out the holes slightly to remove the last of the junk built up in them. I ended up filling the holes with JB Water Weld, which I think should give me a pretty good seal. I'll sand it when we get ready for paint. I spent a fair amount of time trying to get the smashed bits of edging repaired before putting on the new butyl tape and screwing the edging back in place. I used all new stainless steel screws for a long life. This Saturday we tackle the other side. It has no goo or caulk and isn't damaged at all. I'm hoping for an easier day.
Finally at the end of the day here is the replaced and re-taped drip edge. Looking all nice and clean. We had hoped to get a couple of the windows done as well, however this took a lot more time than we expected.
 |
| a view from the front |
Here you can see she still has the hideous painted window on the front. That's next up on our list. I can hear her sigh in relief, and thankfulness.
That reminds me. Our 'baby' has been missing from our lives for a little over a week now. It's amazing how such a thing can make a difference, but driving my daily rounds is torturous again. I feel so average Joe (no offense to any Joe's out there). She is in the shop with a friend of ours getting a complete engine rebuild. Soon she'll be good as new. I can't wait to drive her again. My scarf and sunglasses are all ready!
Then this will be us again...
stay tuned for my next post, adventures of an ADD crafter....


No comments:
Post a Comment